 简体中文
简体中文 English

Calibration techniques for universal joint installation angles
Universal Joint Installation Angle Calibration Techniques: Ensuring Smooth Power Transmission
Understanding Angular Misalignment and Its Impact
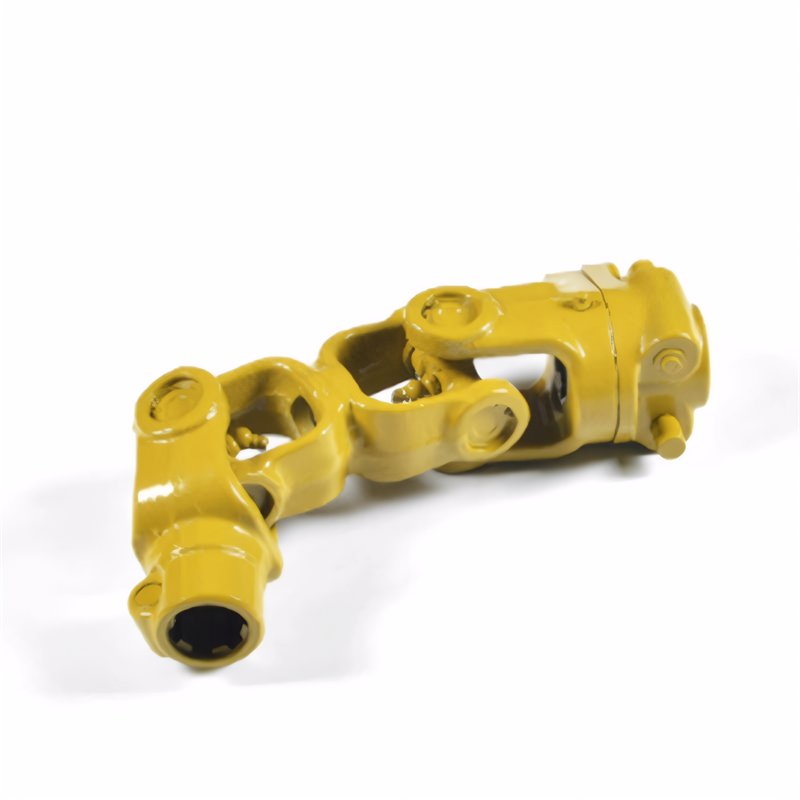
Universal joints, or CV joints, transfer torque between shafts at varying angles, but improper installation can lead to misalignment. Even slight angular errors—as small as 1–2 degrees—can cause vibration, accelerated wear, or premature failure. Misalignment creates uneven load distribution, forcing bearings or splines to operate under stress beyond their design limits. For example, a driveshaft in a vehicle with a misaligned universal joint may produce a clunking noise during gear shifts or exhibit excessive play in the joint housing.
To diagnose misalignment, use a dial indicator to measure radial runout at the joint’s yoke ends. A deviation exceeding 0.05 inches (1.27 mm) typically indicates alignment issues. Additionally, inspect for uneven wear patterns on bearing surfaces or splines, which often appear as localized scoring or pitting. Addressing misalignment early prevents costly repairs down the line.
Identifying Common Misalignment Causes
Misalignment often stems from installation errors, such as incorrect mounting heights or uneven spacing between components. For instance, if one driveshaft yoke is installed 0.5 inches (12.7 mm) higher than its counterpart, the universal joint will operate at an angle, causing binding. Another common issue is improper torque application during fastening, which can distort the joint housing or shift components out of position.
Environmental factors like thermal expansion or foundation settling may also contribute to misalignment over time. In industrial settings, a conveyor system’s universal joint might drift out of alignment if the supporting structure shifts due to vibration or load changes. Regular inspections—ideally every 6–12 months—help catch these issues before they escalate.
Step-by-Step Angle Calibration Process
Calibrating a universal joint’s installation angle requires precision tools and a methodical approach. Start by securing the shafts in a stable fixture to prevent movement during adjustment. Use a laser alignment tool or digital protractor to measure the angle between the input and output shafts. For most applications, the operating angle should not exceed 15–20 degrees; exceeding this limit reduces joint lifespan and efficiency.
If the angle is too steep, adjust the mounting points. For example, in a vehicle driveshaft, lower the transmission or differential mount to reduce the joint’s inclination. In industrial machinery, shim the bearing housings or use adjustable mounts to reposition components. After making adjustments, re-measure the angle to confirm it falls within the acceptable range.
Fine-Tuning with Shim Adjustments
Shims are thin metal plates inserted between mounting surfaces to correct minor alignment errors. If the angle is off by 1–3 degrees, shimming can provide a quick fix without requiring major disassembly. For instance, placing a 0.02-inch (0.5 mm) shim under one yoke can tilt the joint slightly, aligning it with the opposing shaft.
When using shims, ensure they’re made of a material compatible with the joint’s operating environment. Stainless steel shims resist corrosion in humid conditions, while aluminum shims may be suitable for dry, low-stress applications. Always install shims evenly to avoid introducing new misalignment issues.
Verifying Alignment Under Load Conditions
Alignment checks performed at rest may not reflect real-world operating conditions. After initial calibration, test the joint under load to ensure it maintains proper alignment during use. For automotive applications, take the vehicle for a test drive, monitoring for vibrations or unusual noises at various speeds. In industrial settings, run the machinery at full load for 30–60 minutes, then re-inspect the joint for signs of stress or movement.
Dynamic Alignment Testing Methods
Dynamic testing involves using vibration analyzers or strain gauges to monitor the joint’s behavior during operation. These tools detect imbalances or misalignment-induced stresses that static measurements might miss. For example, a vibration analyzer can identify frequency spikes corresponding to joint misalignment, allowing technicians to pinpoint the issue’s source.
If dynamic testing reveals persistent misalignment, revisit the calibration process. Check for loose fasteners, worn bearings, or damaged splines that may have gone unnoticed during initial adjustments. In some cases, replacing the joint or its components may be necessary to achieve reliable performance.
Maintaining Alignment Over Time
Universal joint alignment isn’t a one-time task; regular maintenance is key to long-term reliability. Schedule periodic inspections—every 3–6 months for high-use applications—to check for signs of wear or shifting components. Lubricate the joint according to the manufacturer’s recommendations, as dry or contaminated lubricant can accelerate wear and alter alignment.
Preventing Future Misalignment Issues
To minimize misalignment risks, follow best practices during installation and operation. Ensure all mounting surfaces are clean and free of debris before assembling the joint. Use torque wrenches to tighten fasteners to the specified value, avoiding over- or under-tightening. In applications with frequent thermal cycling, account for expansion and contraction by leaving slight clearance in mounting points.
Educate operators on proper use to prevent accidental misalignment. For example, in agricultural equipment, avoiding sudden impacts or overloading can reduce stress on universal joints. By combining proactive maintenance with careful operation, you can extend the joint’s service life and maintain optimal power transmission efficiency.
By mastering these calibration techniques, technicians can ensure universal joints operate smoothly, reducing downtime and repair costs. Whether in automotive, industrial, or marine applications, precise angle alignment is essential for reliable performance.
 Method for detecting the stabi
 Reliability testing standard f
 Certification of environmental
Transmission shaft safety perf
Certification of environmental
Transmission shaft safety perf